


Introduction
Potentiometer-based servo motors are extensively used in various applications due to their precise control capabilities. They offer smooth and stable operations in robotics and automation applications. Servo motors can be controlled using multiple methods and microcontrollers, such as those Arduino servo motor controls. Among these, one popular approach is using a potentiometer. A potentiometer-based servo motor control system allows operators to adjust the servo motor’s position by simply turning a knob or dial. This article guides you in controlling a potentiometer-based servo motor using an ESP32 microcontroller.
The Significance of Controlling Servo Motors with a Potentiometer
Controlling potentiometer-based servo motors offer unparalleled advantages. The process provides precise positioning, ensures safety, maintains stability, and helps calibrate the motor’s behaviour. The potentiometer’s convenient monitoring and adjustment allows operators to optimise the motor’s performance, ensuring accurate control over its position. Furthermore, servo motors controlled through a potentiometer provide a user-friendly way for intuitive interaction with precise control. In addition, using potentiometers for servo motor control is an affordable solution to other methods as they are cost-effective.
The Primary Components Required to Control Potentiometer-based Servo Motor
There are some essential components involved in the setup, including:
- Servo Motor – A servo motor is an electric device rotating or moving to a specific position based on the received input signals. It comprises a control circuit, a gearbox, and a DC motor, providing smooth movement.
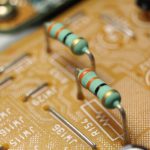
- Potentiometer – A potentiometer, also known as a variable resistor, is a three-terminal component allowing for varying the resistance by adjusting a knob or dial. The device in the bespoke setup acts as a position sensor and input device to control the servo motor’s position.
- ESP32 Microcontroller – A microcontroller acts as the system’s brain and processes the signals to control the servo motor based on the potentiometer input.
- The ESP32 is a powerful development board, an Espressif Systems’ popular microcontroller. It features a dual-core processor, built-in Wi-Fi, memory, and Bluetooth capabilities. The ESP32 is a successor to the ESP8266 microcontroller and is regarded as the brain of the project, receiving input from the potentiometer. It also sends control signals to the servo motor and is widely used in IoT and other embedded systems due to its unique and versatile characteristics.
- Analogue-to-Digital Converter–ADC – The ADC measures and converts the analogue signals–generated by the potentiometer representing the motor’s position into digital values.
- Motor Driver – The motor driver is an advanced electronic circuit that manages to control the power supplied to the servo motor. It takes the control signals from the microcontroller and amplifies them to provide sufficient current and voltage to drive the motor.
- Power Supply – Since the servo motor and the motor driver require a power supply to operate, a power supply with an appropriate voltage and current should be available. Ensure the power supply is according to the motor’s specifications and driver’s requirements.
- Wiring and Connections – Proper wiring and connections are essential to establish communication between the components. This includes connecting the potentiometer to the motor shaft and ADC and the microcontroller or microprocessor to the ADC and motor driver.
Basic Steps for Controlling Potentiometer-based Servo Motor
Controlling a potentiometer-based servo motor using an ESP32 microcontroller typically involves the following key steps:
Step 1: Hardware Setup
- To set up the hardware, first, begin by connecting the potentiometer and servo motor to the ESP32 board.
- The potentiometer features three terminals, including VCC (5V), GND (ground), and the middle terminal connected to an analogue input pin of the ESP32.
- Connect the servo motor’s power and ground pins to the 5V and GND pins of the ESP32, respectively.
- Finally, connect its control signal pin to a digital output pin on the ESP32.
Step 2: Software Setup
- To program the ESP32, an Integrated Development Environment–IDE is required, such as the Arduino IDE or PlatformIO. Ensure the necessary ESP32 board package is installed in your chosen IDE.
- Create a new project adding the appropriate libraries to control the analogue input and the servo motor. Use the ‘Servo’ library available in the Arduino ecosystem.
Step 3: Reading Potentiometer Values
In the code, initialise the analogue input pin connected to the potentiometer. Use the analogRead() function to obtain the potentiometer’s position, giving a corresponding value from 0 to 1023.
Step 4: Mapping Potentiometer Values
Servo motors typically operate within a limited range, so map the potentiometer values to the desired servo angles. For example, if a specific servo motor has a range of 0-180 degrees, use the map() function to convert the potentiometer values (0-1023) to servo angles (0-180).
Step 5: Servo Motor Controlling
Add a servo object and attach it to the digital output pin connected to the servo motor. Next, use the write() function to send the mapped servo angle value. Based on the received control signal, the servo motor will move to the corresponding position.
Step 6: Continuous Control
To continuously control the servo motor’s position, place the code for reading the potentiometer, mapping the values, and controlling the servo motor inside the loop() function. This means the servo motor’s position is updated in real-time according to the potentiometer’s position.
Step 7: Testing and Refinement
Upload the code to your ESP32 board and power it up. As you rotate the potentiometer knob, the servo motor should move accordingly, mimicking the potentiometer’s position.
The End Thoughts
Controlling a potentiometer-based servo motor using an ESP32 microcontroller is a relatively straightforward process using a simple dial or knob. By following the steps outlined, it is possible to successfully set up and control a servo motor with a potentiometer. With the ESP32’s versatility and other platforms’ ease of programming, like Arduino, you can achieve accurate and precise control over the servo motor’s movement. These simple steps can bring your projects to life with minimal effort and maximum control, opening a new range of possibilities for implementing servo-driven applications.
Related posts:
 Design Considerations for Cellular IoT in 5G Network
 How to Secure your Blockchain Solutions
 LED Connectors: Streamlining Assembly Efficiency
 Zero-Ohm Resistors: Uses and Benefits
 XMC1202 LED Lighting Shield for Arduino
 An Electronic Converter For Large Wind Turbines , Transistor
 Connectors: TE Connectivity Nector M Power Connector
 What are the Different Types of Molex Mega-Fit Power Connectors
 ITT Cannon Trident Cost-Effective Connectors
 How to Choose LED Drivers and LED Power Supplies
 Roller Machine for Home Use
 Sensirion SEK-SHTxx/SGP30 Sensor Evaluation Kit


