


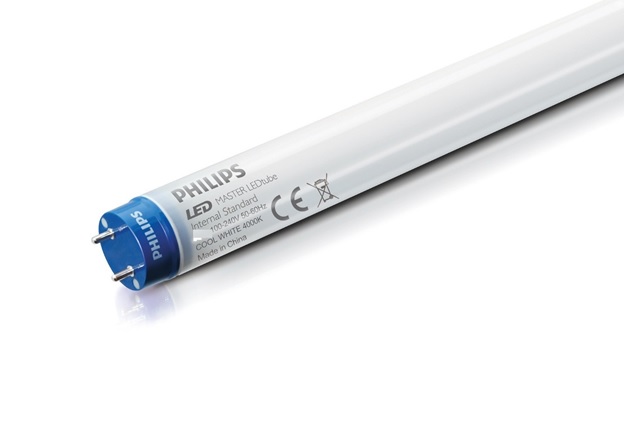
For decades now, the T8 fluorescent has dominated our homes and our workplaces as the preferred form of lighting. Its dominance is due to the fact it produces quality light and it is very efficient. They also last for longer than its immediate alternatives. Its dominance is about to lessen though. T8 LED tube is the new player in the lighting arena and it bears a lot of promises. Besides being more efficient than the T8 fluorescent, it is mercury free, easier to control and is dimmable.
Installation guide for T8 LED tubes
-
Safety first
Switch off the electricity. Put “lockout” tag to ensure to ensure no one turns it back up. Put a note close to the circuit breaker explaining that you are working on a fixture within the building and so the breaker should be kept off until you complete the task. Also, wear eye protection to guard your eyes against harm should an old fluorescent tube break while you are removing it. It is also important that you confirm your source supplies between 120V and 240V.
-
Remove the bulbs and the ballast
Some fluorescent lamps are covered using plastic or glass fixtures. Remove the fixture to access and remove the bulb. Take care not to damage it as it is very fragile. Remove the cover of the housing (tombstones) to reach the ballast. Undo any wires leading into and out of the ballast and unscrew it from the housing assembly. Ensure to leave enough of the neutral and live wires for later rewiring. Dispose of the bulb and the ballast responsibly.
-
Rewire the unit
Connect the wires correctly. To achieve this, it’s advisable that you follow the instructions on the box. You can either use connectors or just twist the wires together. In many installations, the wires usually consist of two yellow on the left, two red and two blue on the right. Put together all the wires from one side with one lead from the incoming circuit wires and those from the other side with the other lead. However, it is important to note that some LED has both the hot and the neutral on one end of the connection. Therefore, you need to refer to the manufacturer’s instruction if you are not sure of the configuration.
-
Install the LED
Remove the T8 LED tube from the packaging. Remove its tip guards and re-install it the same way you would install a fluorescent T8 (insert each end into the slots and twist the tube to lock). Ensure the tube is facing down.
-
Test the LED
Go to the mains circuit breaker and turn on the breaker. Switch on the light and the LED should light up just fine. If it does not, you might need to check your connections again. Switch the breaker off, put back the covers and then switch it back on. Remove the note you had placed on the breaker and enjoy the light from the T8 LED tube.
Unlike the T8 fluorescent tube that lasts for 30,000 hours, the T8 LED lasts for 50,000 hours. It also produces nicer colour cast and doesn’t flicker. Unfortunately, your fixture will no longer be able to work with a fluorescent tube since you have removed the ballast. The good news is that you might never need it.
Related posts:
 Developing Infrastructure to Electric Charging Connectors
 Door Lock Buying Guide for Newbies
 Replacing the Light Switch with a New Dimmer Switch
 Automotive Lighting Applications-Enrgtech LTD
 3 Main Connectors for the Computer System Everyone Should Know
 Amazing Tips You Must Try to Wash Cars At Home Like A Pro
 Isolated Current Sensors for Circuit Safety
 Adhesives Guidebook – Definition, Types and Examples
 How Does a Dedicated Computer Circuit Work for Home Offices?
 Different Types of Electric Motors in the Electronics World
 How to Install an Electric Water Heater in a Mobile Home?
 Leading Brands for Home CCTV


